7-Channel ELRS Receiver with PWM and UART
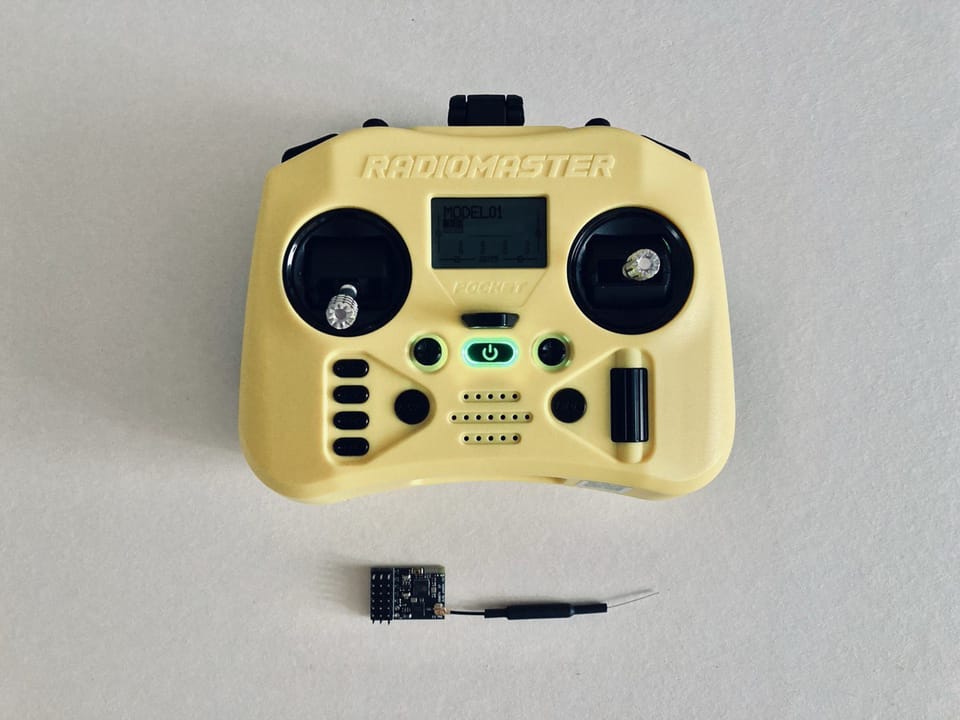
After three days and nights of experiments with the 7-channel ELRS receiver (some labeled as Cyclone, some unbranded but sharing the same hardware), we finally got it working with the RadioMaster Pocket (though you can use any ELRS transmitter) and the latest ELRS receiver firmware.
You can also use this guide as a reference for almost any ELRS receiver with ESP8285 or ESP32C3 SoCs.
Connections
As with most no-name electronics from AliExpress, there’s virtually no documentation on how to connect this 7-channel ELRS receiver. Here’s what we figured out:
- Powering the board: Connect a 5V source to any golden pin marked "5V" and a ground wire to any pin marked "G". The pads labeled "+" and "-" are unclear, so leave them unconnected.
- PWM Mode: To use PWM outputs, connect the required channel outputs to your motors. Remember to provide power by connecting a power source to any "5V" and "G" pin.
- UART Mode: To use UART, connect RX, TX, GND, and 5V on the receiver to TX, RX, GND, and 5V on your flight controller.
- Note: This receiver cannot operate in both UART and PWM modes simultaneously. The provided configurations (explained below) only allow for either mode, not a hybrid (PWM + UART) mode.
How to Switch Between UART and PWM Modes
- Download the configuration files:
7channel-ELRS-receiver.
- Power the receiver and wait ~60 seconds until the LED blinks rapidly.
- On any device, connect to the ExpressLRS WiFi network (password:
expresslrs). - Open a browser and navigate to http://10.0.0.1/hardware.html.
- Click Upload, and select either:
7CH.json(for 7-channel PWM mode), orCRSF.json(for UART mode).
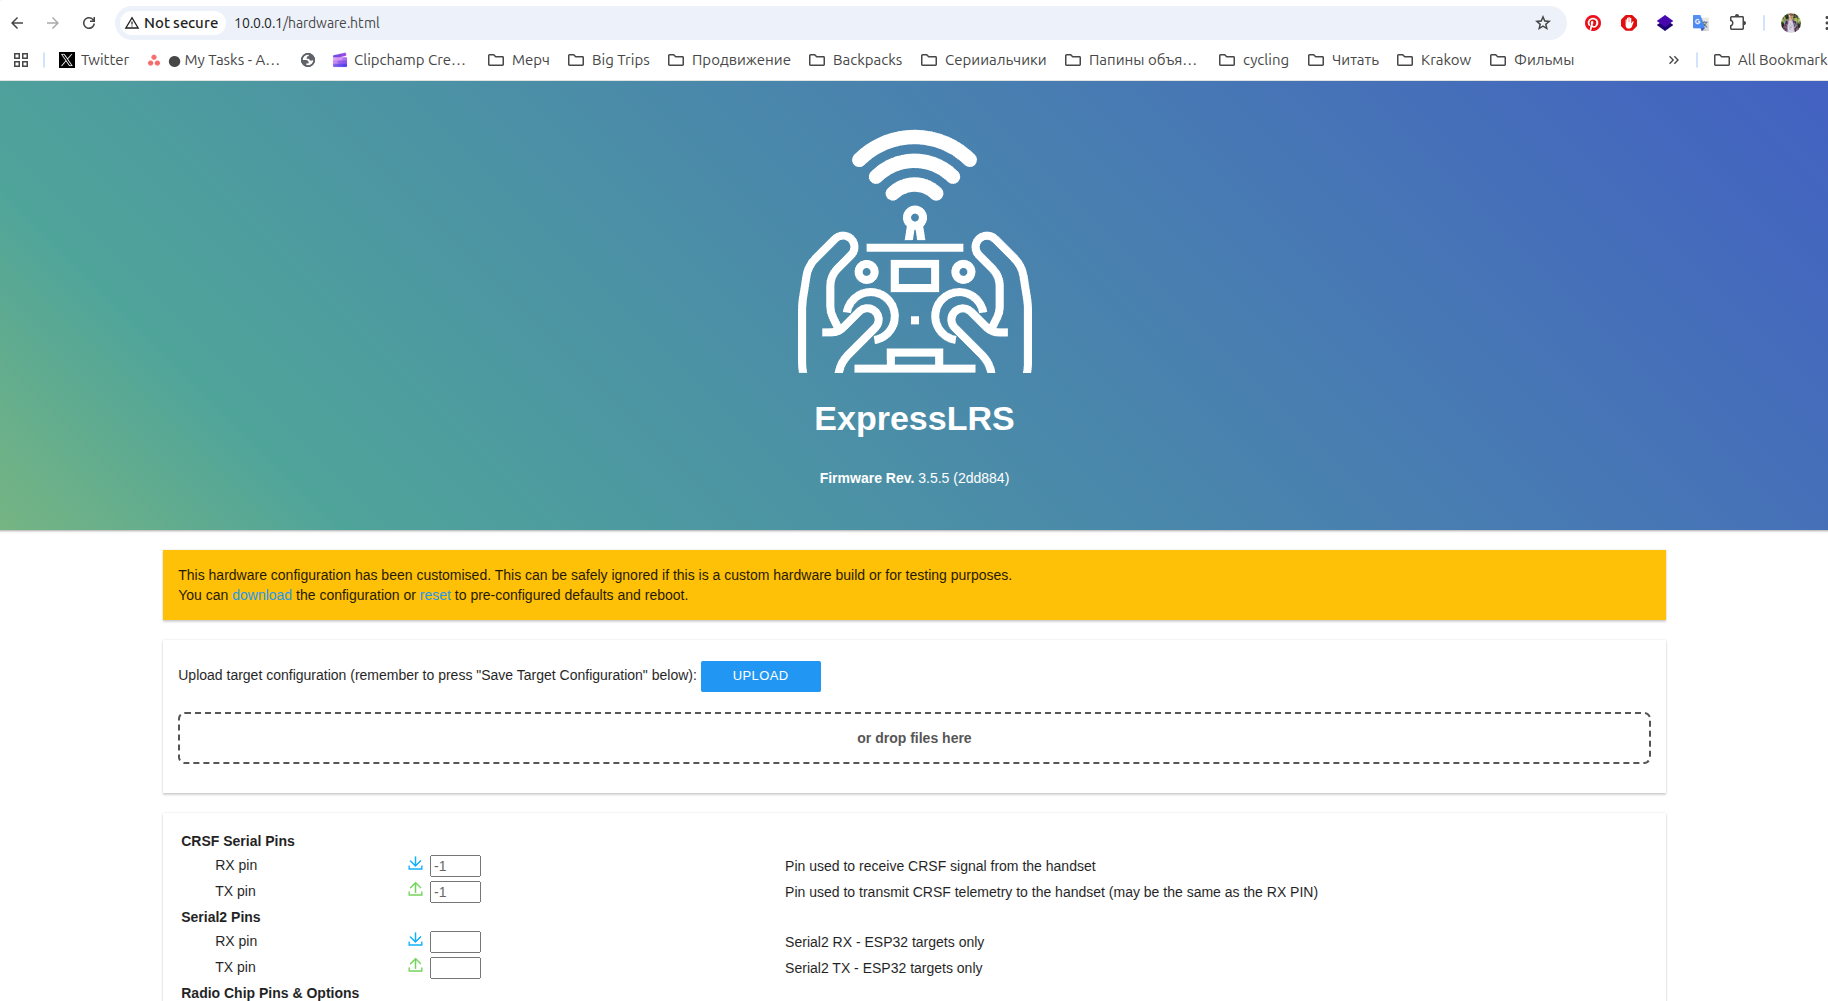
- Click Save Target Configuration.
- Power on your transmitter and check the setup with a test servo motor.
LED Status Indicators
- Slow blinking: Receiver is in binding mode.
- Solid on: Connected to a transmitter.
- Fast blinking: WiFi mode is active. Connect to the receiver from any device with WiFi. (This mode activates ~60 sec after entering binding mode or can be enabled from the ELRS menu on your transmitter.)
How to Update ELRS Firmware
Using WiFi
- Download ExpressLRS Configurator.
- Put the receiver into WiFi mode (wait ~60 sec in binding mode with the transmitter off, or enable WiFi from the ELRS menu on the transmitter if already bound).
- In ExpressLRS Configurator, select:
- Target:
BetaFPV PWM RX. - Flashing Method:
Upload over WiFi.
- Target:
- Click Flash.
- During the upload, your computer may display errors in the configurator log. When this happens, open your device’s WiFi settings and connect to the ExpressLRS network (password:
expresslrs).- Your computer must be connected to the receiver's WiFi to upload the firmware, though an internet connection is needed to build the firmware.
- Tip: It’s highly recommended to buy an FTDI module when purchasing the receiver. Uploading the wrong firmware is easy, and FTDI is needed to recover the receiver.
Using FTDI (if the receiver can’t enter WiFi mode):
- Connect RX, TX, VCC, and GND on the FTDI module to TX, RX, any 5V, and any GND pin on the receiver.
- Connect the FTDI module to your computer.
- In ExpressLRS Configurator, select:
- Target:
BetaFPV PWM RX. - Flashing Method:
UART (Serial).
- Target:
- Click Flash.
If you have any questions or feedback, feel free to contact us at hey@tinkerflight.com.